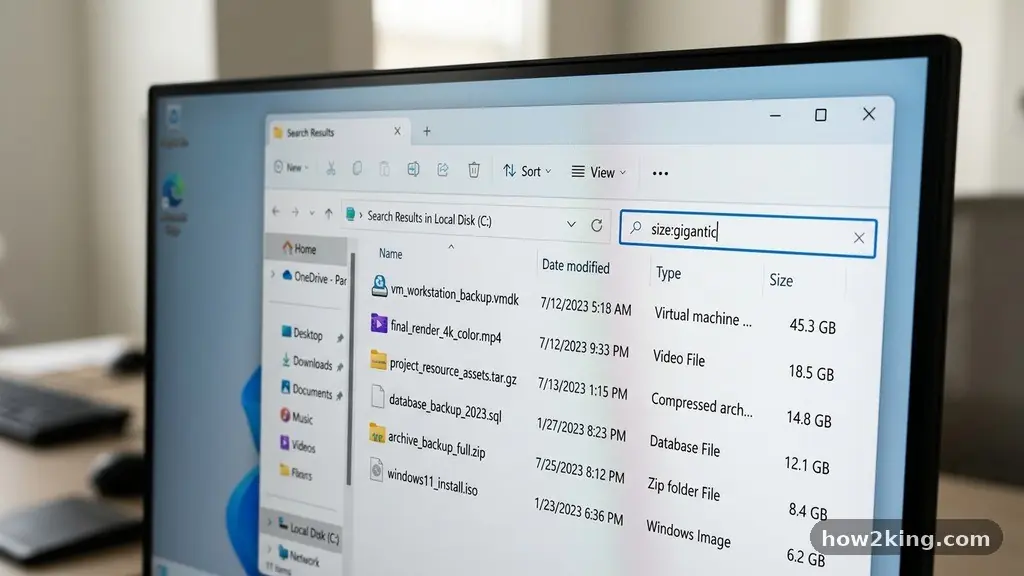
Learning the art of finding Large Files Taking Up Space on a Windows PC is the most effective way to regain control over your digital environment. When your drive begins to run low on capacity, the culprit is often a collection of forgotten media, temporary archives, or massive installers hidden deep within your folders.
By identifying these heavy items, you can reclaim significant disk space without needing to upgrade your hardware. This process is straightforward once you know where to look and which tools are designed to surface the largest files on your system.
Utilizing Windows File Explorer for Quick Identification
The most accessible method for finding Large Files Taking Up Space on a Windows PC involves using the built-in search functionality in File Explorer. You do not need third-party software to get a clear view of your storage hierarchy.
Simply open File Explorer and navigate to the drive or folder you wish to scan. Click into the search bar at the top right of the window to reveal the hidden “Search Tools” tab.
Once you have activated the search bar, look for the size filter option. You can manually type “size:gigantic” to instantly filter for any files larger than 128 MB.
This command is a powerful shortcut that saves you from manually browsing through thousands of subfolders. If you want to refine your search further, you can use “size:huge” for items between 16 MB and 128 MB.
This method works well because it relies on the native indexer of your operating system. It is particularly effective for locating stray video files or uncompressed disk images that might have been sitting in your Downloads folder for months.
Always be cautious when reviewing the results, especially if you see files located within the Windows or Program Files directories. Deleting files you do not recognize can lead to system instability, so stick to personal documents, media, and temporary archives.
Managing Storage with Built-in Settings
Windows includes a dedicated feature called Storage Sense that provides a high-level view of your disk usage. To access this, open the Settings app and navigate to System, then select Storage.
This interface displays a breakdown of your categories, such as Apps & features, Temporary files, and Other. It is an excellent way to see which areas of your drive are consuming the most space at a glance.
Within the Storage menu, you can click on “Cleanup recommendations” to see if Windows has already identified large, unused files for you. The system often tracks files that have not been opened in a long time or downloads that are taking up unnecessary room. This feature is particularly helpful for users who want to avoid the manual labor of digging through deep directory structures.
If you are running Windows 11, the interface is even more streamlined. You will see a visual bar indicating how much space is left on your primary drive.
Beneath this, the operating system categorizes files by size and type, making it easy to identify large personal items versus system-related data. By leveraging these native tools, you ensure that you are not accidentally removing critical components required for your PC to function correctly.
Leveraging Third-Party Visual Analyzers
Sometimes, a list-based view is not enough to visualize where your gigabytes are vanishing. Visual disk space analyzers provide a map of your drive, showing large files as blocks of varying sizes.
One of the most respected tools for this task is WinDirStat, which has been a staple for power users for years. It scans your entire drive and renders a color-coded tree map of every file and folder.
The beauty of this visual approach is that it highlights “clumps” of data. If you have a folder filled with high-resolution photos or a massive virtual machine disk, it will appear as a large, distinct block on your screen.
You can then hover over these blocks to see exactly which files are responsible for the footprint. This makes it much easier to decide what to delete compared to scrolling through a long, text-based list.
When using these tools, you should focus on the largest, most obvious blocks first. Often, you will find that a few massive files are responsible for the majority of your disk congestion.
Once you have identified these, you can right-click them within the app to open their location or delete them directly. Just remember to empty your Recycle Bin afterward to ensure that the space is actually recovered.
Understanding the Difference Between Personal and System Files
When you are in the process of finding Large Files Taking Up Space on a Windows PC, you must distinguish between personal content and system files. Personal files are usually located within your user profile, specifically in folders like Documents, Pictures, and Downloads.
These are generally safe to move or remove if you no longer need them. You should prioritize these for your cleanup efforts.
System files, on the other hand, are essential for the operating system to remain stable. These are typically found in the C:\Windows folder and various hidden system directories.
You should never manually delete files in these locations unless you are using a dedicated cleanup tool provided by Microsoft. Removing the wrong system file can prevent your computer from booting or cause critical applications to crash.
To stay safe, always check the file path before hitting the delete key. If a file is located in a folder with a name like “System32” or “WinSxS,” leave it alone.
The risk of breaking your installation far outweighs the potential for a few hundred megabytes of reclaimed space. Stick to your own user-created content to ensure your PC remains healthy and reliable after your cleanup.
Comparing Methods for Disk Cleanup
Different approaches offer varying levels of detail and speed. Depending on your technical comfort level, you might prefer a simple search or a detailed visual map. The table below summarizes the common ways to reclaim space on your drive.
| Method | Ease of Use | Best For |
|---|---|---|
| File Explorer Search | High | Quickly finding known file types |
| Storage Sense | High | Automated, safe cleanup |
| Visual Analyzers | Medium | Deep dives into complex folders |
| Command Prompt | Low | Advanced users and automation |
Each of these methods serves a different purpose in the workflow of finding Large Files Taking Up Space on a Windows PC. Most users find that combining the simplicity of Storage Sense with the precision of a visual analyzer provides the best balance.
You do not need to be an IT expert to make a significant impact on your available storage. Start with the easiest tools and move to more advanced options only if you still need more room.
Best Practices for Maintaining Disk Health
Finding large files is only half the battle; preventing your drive from filling up again is equally important. One of the most effective habits you can develop is regular digital maintenance.
Set a reminder to perform a quick scan of your Downloads folder every month, as this is usually where the largest, most redundant files accumulate. Most of the content you download is only needed once, yet it often remains on your drive indefinitely.
Another strategy is to offload non-essential data to external storage or cloud services. If you have years of photos or videos that you rarely access, moving them to an external SSD or a cloud provider can free up massive amounts of space on your primary drive.
This keeps your main disk fast and responsive for your active applications. It also provides an extra layer of redundancy in case of a hardware failure.
Finally, consider the software you install. Large games and creative suites often leave behind massive cache files or previous versions of updates. Periodically checking your “Apps & features” list can reveal programs you no longer use.
Uninstalling these can reclaim gigabytes of space that you might have otherwise forgotten about. Keeping your digital workspace lean is a continuous process that pays off in system speed.
Common Questions Regarding Storage Management
How do I know if a file is safe to delete?
Generally, any file you created yourself—like a photo, a document, or a video—is safe to delete if you no longer need it. If a file is located in a program’s installation folder or a system directory, it is likely necessary for your computer’s operation and should be left alone.
Does clearing my temporary files improve performance?
Yes, removing excessive temporary files can help your system run more smoothly, especially if your drive is nearly full. When a drive reaches capacity, the operating system struggles to find “breathing room” for virtual memory and cache, which can cause noticeable slowdowns.
What happens if I delete something by mistake?
Most files deleted from your drive go directly to the Recycle Bin. You can simply open the bin and restore the file if you realize you made a mistake. If you use the “Shift + Delete” shortcut, the file bypasses the bin, so always double-check before using that command.
Is it worth using a registry cleaner?
In most modern versions of Windows, registry cleaners are unnecessary and can occasionally cause more harm than good. Focus your cleanup efforts on large files and unused applications rather than attempting to optimize the Windows registry, which is rarely the cause of storage issues.
How much free space should I keep on my drive?
It is a good rule of thumb to keep at least 15% to 20% of your total drive capacity free. This allows the operating system to perform background tasks, manage updates, and handle temporary file growth without triggering low-disk-space warnings or performance degradation.
Final Thoughts on Disk Space Maintenance
The process of finding Large Files Taking Up Space on a Windows PC is a simple yet high-impact task for any user. By regularly auditing your storage, you ensure that your system remains responsive and organized. Whether you choose to use the intuitive tools built into your settings or rely on visual maps to pinpoint hidden data, the goal is always to keep your drive clear of digital clutter.
Remember that the best approach is to be deliberate about what you keep and to perform these checks periodically. By staying mindful of your storage, you prevent the frustration of running out of room when you need it most. Take a few minutes this weekend to scan your drive, and you will likely find enough space to keep your computer running smoothly for months to come.